Dont spend your money on smooth vent caps, make your own!!

Disclaimer: Links on this page pointing to Amazon, eBay and other sites may include affiliate code. If you click them and make a purchase, we may earn a small commission.

02cadiHOE

New Member
Joined
Apr 11, 2007
Messages
45
Reaction score
0
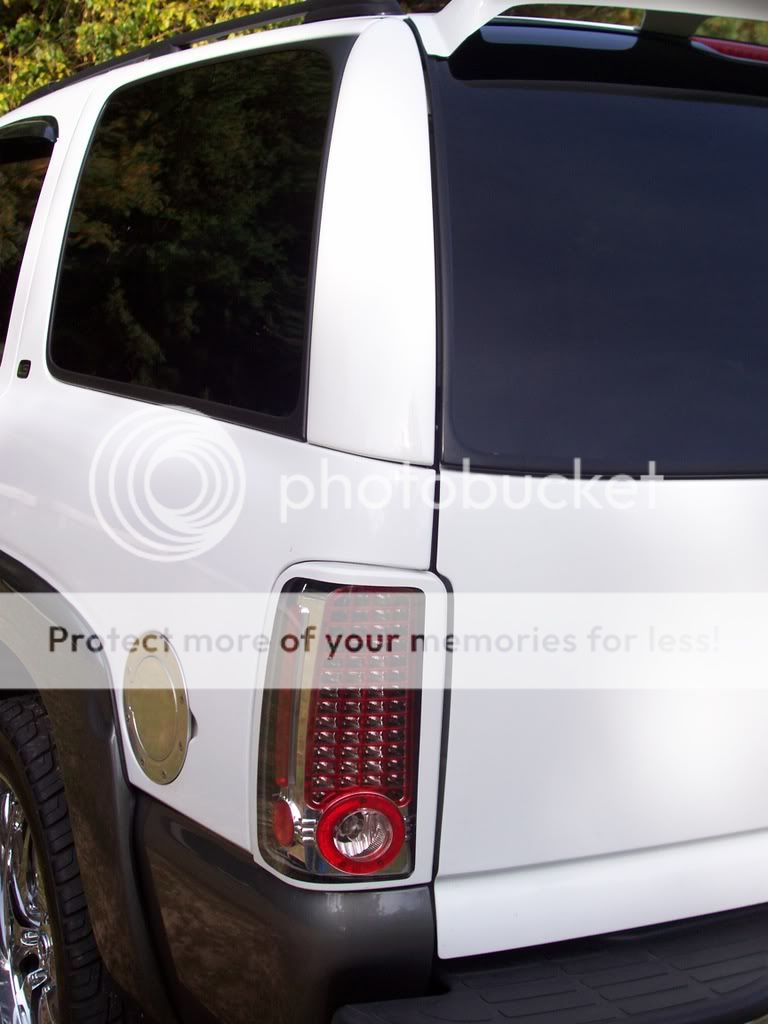
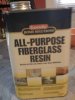
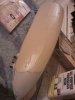
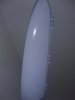
so i have been wanting some of those smooth vent caps for the rear of my tahoe but they are $150 and im to cheap to just buy them so i made my own. i took my oem caps and with a little resin and body filler.... bam! i saved over $100 and couldnt be happier. hope this "how-to" motivates you to get started on yours.

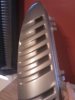
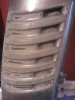
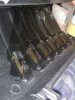
here is what i started with, my factory vent cap that i had painted a while ago
 

Attachments

  • 1.jpg
    1.jpg
    14.7 KB · Views: 161

02cadiHOE

New Member
Joined
Apr 11, 2007
Messages
45
Reaction score
0
then i sanded with 80 grit where i was applying the fiberglass resin
 

Attachments

  • 2.jpg
    2.jpg
    18.6 KB · Views: 103

02cadiHOE

New Member
Joined
Apr 11, 2007
Messages
45
Reaction score
0
i took masking tape on the surface to allow the resin to fill in behind
 

Attachments

  • 3.jpg
    3.jpg
    11.8 KB · Views: 100

02cadiHOE

New Member
Joined
Apr 11, 2007
Messages
45
Reaction score
0
i used plain old fiberglass resin. this is bondo brand but any will work. i think epoxy resin will work also
 

Attachments

  • 4.jpg
    4.jpg
    20.1 KB · Views: 95

02cadiHOE

New Member
Joined
Apr 11, 2007
Messages
45
Reaction score
0
after mixing up the resin i poured it from the back into the holes in the caps til it overflowed a bit. i let them sit at the right angle to let the resin set in as much as possible
 

Attachments

  • 5.jpg
    5.jpg
    23.2 KB · Views: 117

02cadiHOE

New Member
Joined
Apr 11, 2007
Messages
45
Reaction score
0
after the resin hardened up a bit i took a look at the front of the cap and you can see where the resin was nice and thick like i wanted. you can see toward the upper right of the slots needed a little more
 

Attachments

  • 6.jpg
    6.jpg
    12 KB · Views: 108

02cadiHOE

New Member
Joined
Apr 11, 2007
Messages
45
Reaction score
0
peel the tape off after the resin has cured for a while, i let mine sit for about an hour.
 

Attachments

  • 7.jpg
    7.jpg
    57.5 KB · Views: 127

02cadiHOE

New Member
Joined
Apr 11, 2007
Messages
45
Reaction score
0
i did another quick sanding with 80 to rough the surface for body filler then slapped it on
 

Attachments

  • 8.jpg
    8.jpg
    77.4 KB · Views: 102

02cadiHOE

New Member
Joined
Apr 11, 2007
Messages
45
Reaction score
0
i block sanded with 80 til smooth then went over it again with 220. i filled a couple pin holes with body icing. finally primer, 3 coats of filler primer and there it is.... SMOOTH AS EGGS!! just needs painted. this whole process cost less than $50 and they turned out great. you couldnt tell the difference between my homemade caps vs. the ones you buy
 

Attachments

  • 9.jpg
    9.jpg
    25 KB · Views: 144

Tahoez71r

New Member
Joined
Nov 5, 2008
Messages
4
Reaction score
0
very nice, good cheap mod for the DIY'r.

thanks for the write up
 

Design

Full Access Member
Joined
Feb 18, 2008
Messages
80
Reaction score
0
That's an awesome job. Thanks for posting that. I also am too damn cheap to pay for caps but want them in a bad way.

I aslo thought of going this route and molding in some aux. reverse lights or a small LED strip.

Either way yours look great.

Jon
 

JKmotorsports

tahoeyukonforum.com
Joined
Jul 5, 2007
Messages
2,654
Reaction score
3
Location
ATX
Looks great. Nice addition to the tech write-ups. Post some pics of the finished product once you get them painted.
 

IMI4tth3w

New Member
Joined
Oct 10, 2007
Messages
19
Reaction score
0
Location
San Antonio, TX
thats awesome! i was also thinking about adding some led lighting to mine also by drilling a hole in each of the holes with a red led directed outward kind of like how the new escaldes are. kinda. this is definitely a really neat idea
 

02cadiHOE

New Member
Joined
Apr 11, 2007
Messages
45
Reaction score
0
here is the final product. i love the smooth look. cant wait til the weather breaks here i wanna put the 6's on!!
 

Attachments

  • IMAG0055.jpg
    IMAG0055.jpg
    91.4 KB · Views: 150

YukonJacks

Full Access Member
Joined
Feb 24, 2008
Messages
184
Reaction score
0
Location
PA
Not sure but is it possible that resin filler will show cracks after awhile especially if its cold out? Would it be better to put a sheet of fiberglass over it then sand it down? I'm no body guy, just curious before I embark on this project, which is certainly a great idea..
 

Custom73

New Member
Joined
Dec 27, 2008
Messages
31
Reaction score
0
Looks good! Thanks for the write up and pics. I'm too cheap to buy smooth ones too, so I've been wanting to do the same to my stockers, but not experienced enough with fiberglass to just tackle it myself. Now I'm gonna try it. Thanks for the inspiration...
 

02cadiHOE

New Member
Joined
Apr 11, 2007
Messages
45
Reaction score
0
yukonjacks, if you allow the resin to fully cure you shouldnt have any trouble with cracking. i didnt want to wrap it with fiberglass mat or anything cuz i didnt want to jepordize the oem fit. i only used a thin layer of filler, its just like any other part on a car if used properly you wont even be able to see it.

custom73, your welcome.
 
Last edited:

JKmotorsports

tahoeyukonforum.com
Joined
Jul 5, 2007
Messages
2,654
Reaction score
3
Location
ATX
Not sure but is it possible that resin filler will show cracks after awhile especially if its cold out? Would it be better to put a sheet of fiberglass over it then sand it down? I'm no body guy, just curious before I embark on this project, which is certainly a great idea..

As long as the MEKP/resin ratio is just right and the resin isn't applied in thick layers between curing, then you shouldn't have any problems.
MEKP to resin mixture needs to be at a certain percentage, depending on ambient temperature. Too much will cause the resin the crack during the curing process. Too little will slow down the curing process considerably. It's also best to lay a thin coat of resin and let cure before adding another layer.
 

DarkTahoe00

Full Access Member
Joined
Dec 1, 2007
Messages
259
Reaction score
0
Location
IN
I did The same just a little different way and material. JK is right it does have to be a right mixture. I've had no problems with mine cracking in the cold, I live in the midwest where it can get pretty cold :(
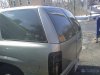
! Here's a of shot of mine! 02cadiHOE Great write up! You did really great work on those look Awesome!
Picture195.jpg
 
Last edited:
Top