THE YETI
Supporting Vendor
HARNESS PRICING
-V1.0 Harness as pictured in the how-to (requires you to do some extra splicing) $160.00 shipped
-V2.0 Harness (see post #38) $185 shipped
*You will need to send me your Escalade harness, everything else is included
_____________________________________________________________________________________________________________________
I'm sure there has been a few write-ups on this topic, but I figured I'd give it a shot at an all-inclusive "how-to" that actually has pictures and won't disappear on us! I'll be combining some pointers from some previous threads to make this one the "Ultimate HOW TO Thread!"
NOTE: If anyone is interested in one of these harnesses, I would be willing to build them, PM me for details. I can make them shorter if necessary, but I think these served their purpose. This write-up is for my first version of the plug and play harness, V1.0, I am working on a badass V2.0 harness that is completely 100% plug and play, no mounting of resistors needed at all!! :Handshake:
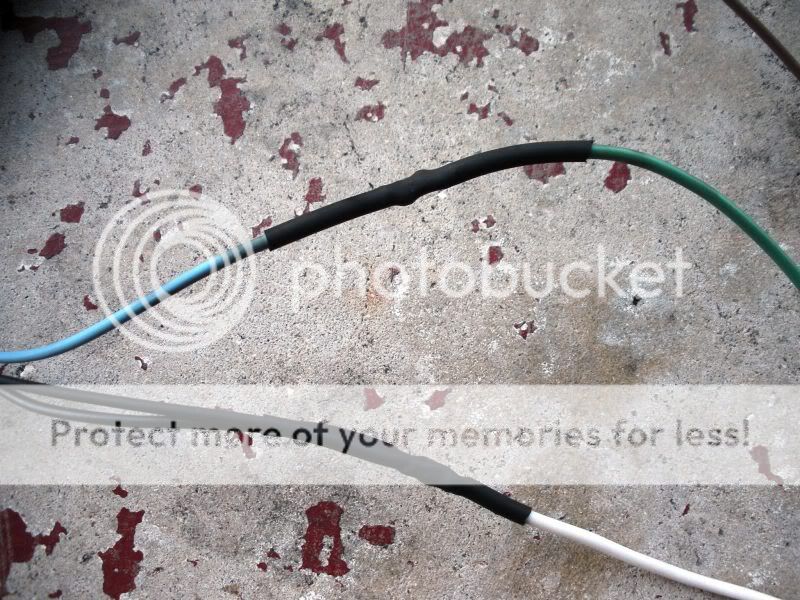
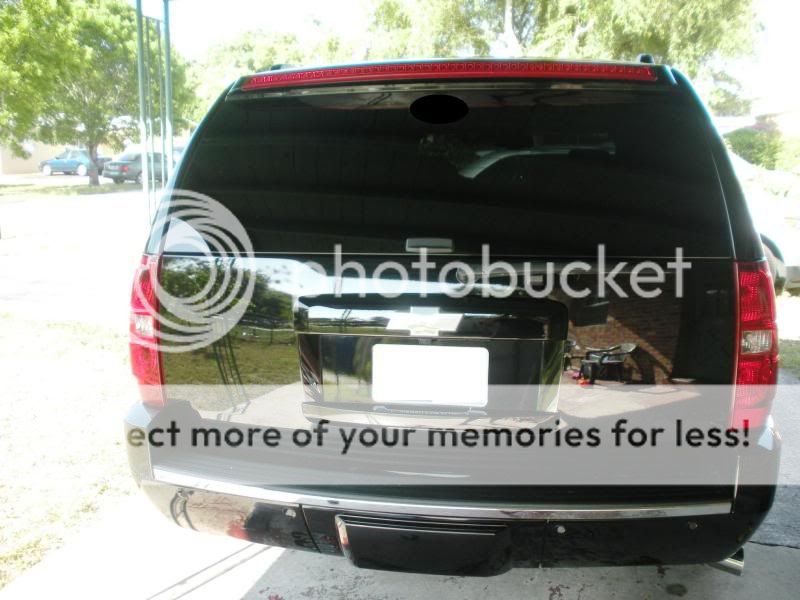
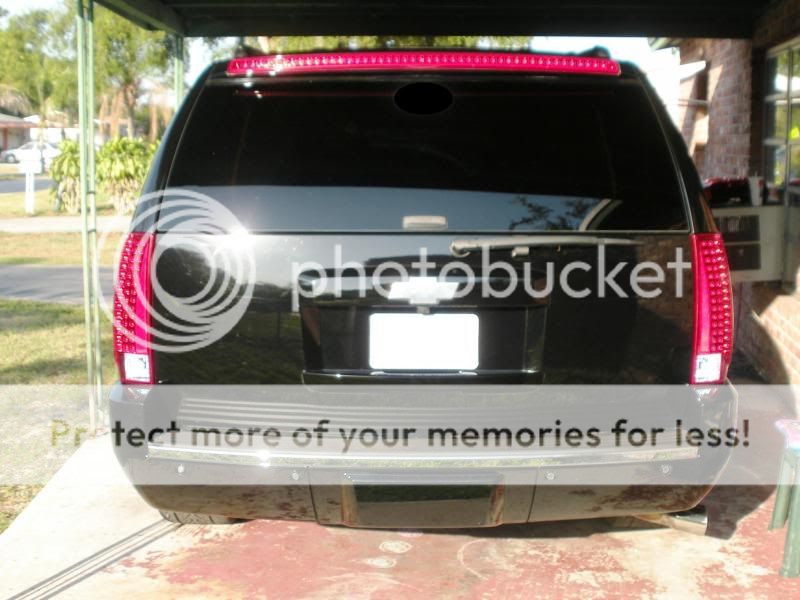
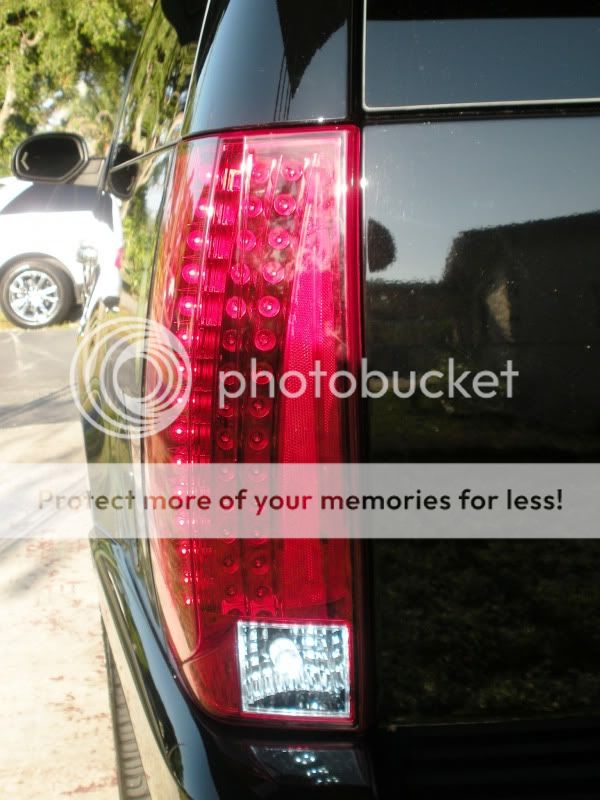
I got the option to score a set of these badboys from a local friend. Since we already had the Escalade 3rd Brake Light, it made it a no brainer to stick these on. This mod is time consuming if you do it the way I did it. Of course, there are short cuts, but I wanted this to look as OEM as possible and be completely plug and play, so I opted to splice the Escalade harness into an existing Tahoe/Suburban/Yukon harness, while soldering all the wires, heatshrinking the connections, and wire looming it all together. All in all it took me roughly two hours to do the first harness and about 25 minutes to do the second (once I got everything measured out so they looked identical).
TOOLS NEEDED FOR THIS PROJECT (What I Used):
-Phillips Head Screwdriver
-Soldering Iron w/ Solder
-Butane Heat Torch or Heat Gun
-Drill with metal drill bits
-Wire Crimpers
-Wire Cutters
-Wiring Schematic (attached to this thread)
-Rivet Gun (not needed, but for my install it is, you'll see why!)
PARTS NEEDED FOR THIS PROJECT (What I used):
-Escalade Tail Lamps, Right and Left Side
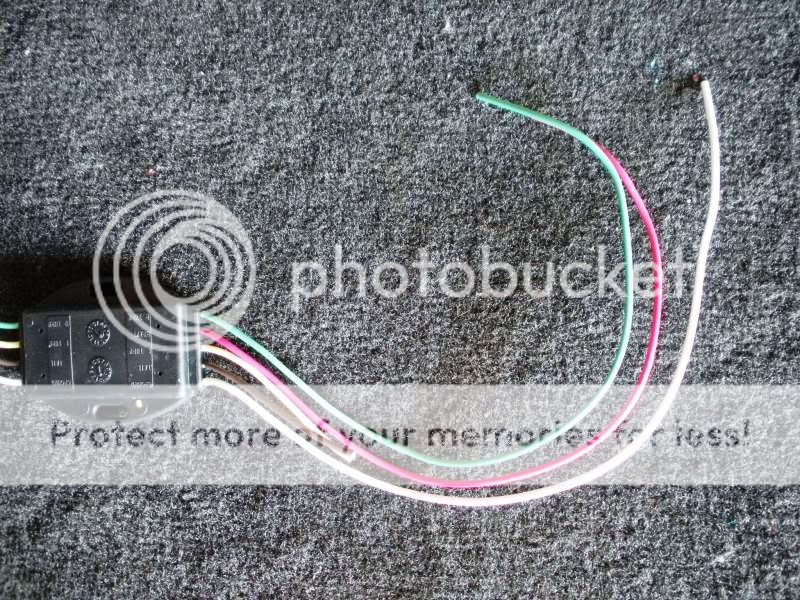
-2qty 5 to 4 Trailer Harness Converters (Hopkins #48845)
-4qty 6ohm/50 watt Power Resistors
-2qty Dual Power Resistor Mounting Plates
-2qty OEM Tail Lamp Harnesses (So you don't have to cut your stock ones)
-1Qty 15262791 2007 Escalade driver side quarter panel upper appliqué
-1Qty 15262792 2007 Escalade passenger side quarter panel upper appliqué
Escalade Tail Lamp Harness (if you need it) is: 15803483 x 2qty
And on to the install....
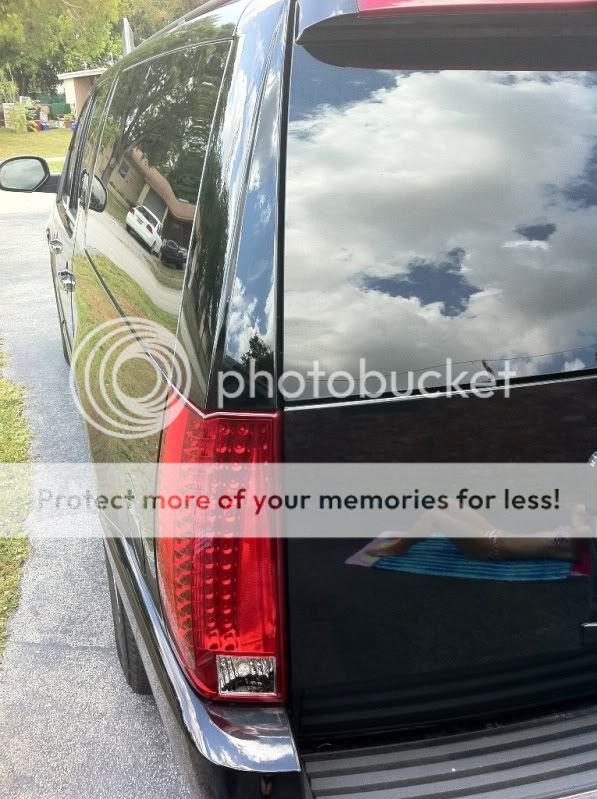
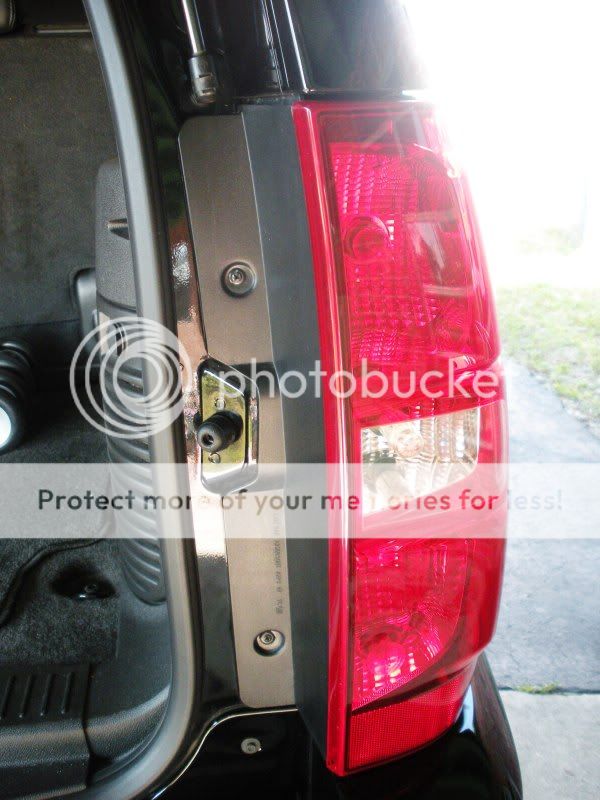
Remove your stock tail lights by using a Phillips head screw driver and unscrewing the two screws you see in the pic below. With gentle pressure, the tail light will pop out towards you after the screws are removed. Follow the harness down under the truck and you will see where it is attached to bottom. Unclip it and remove the tail light and harness assembly. Set aside.
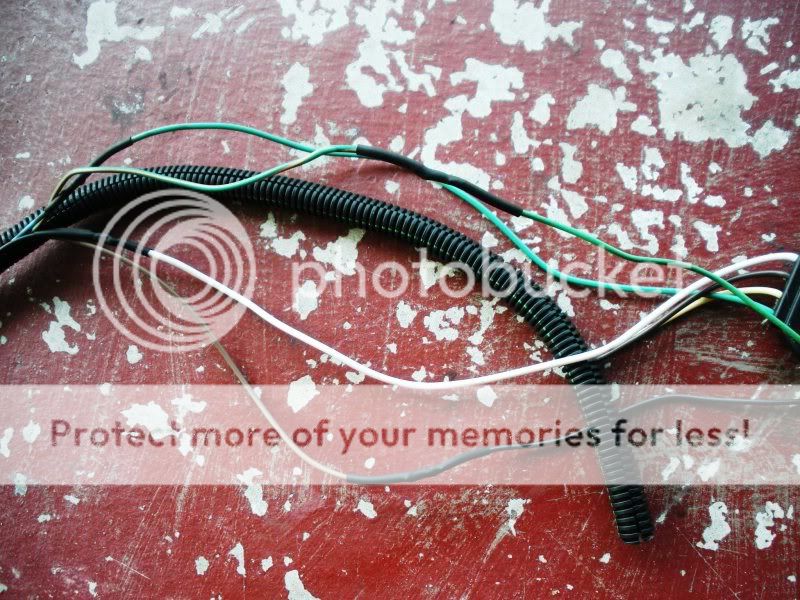
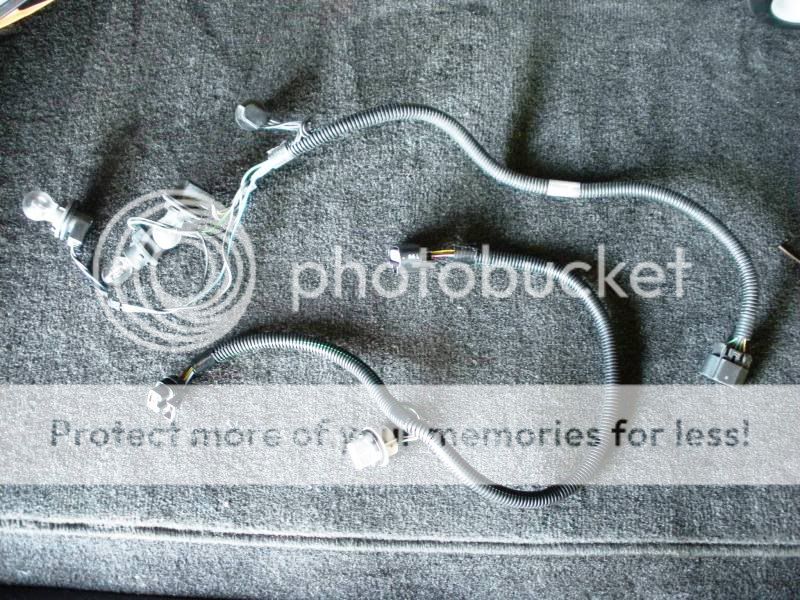
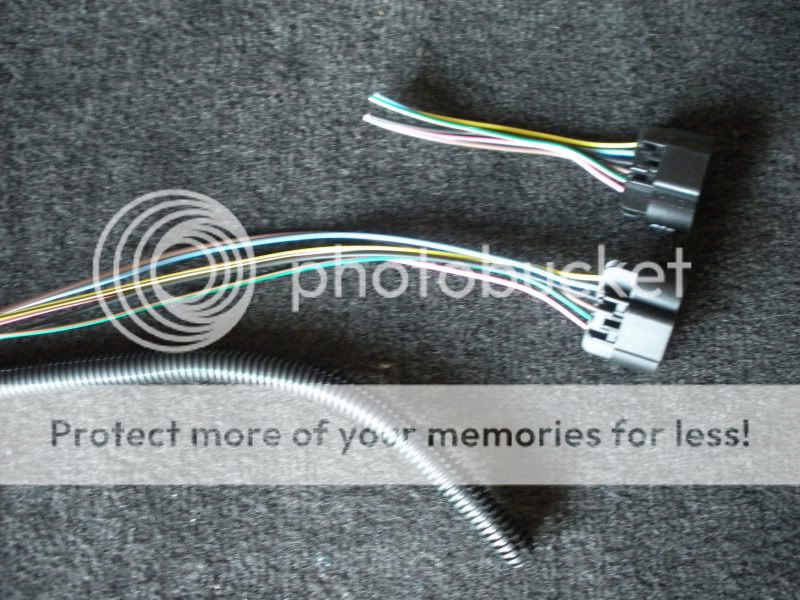
Remove the Light harness from the Escalade Tail Lamp. Pictured below is the Escalade Harness on the bottom and the Tahoe Harness on top, you can see the obvious difference.
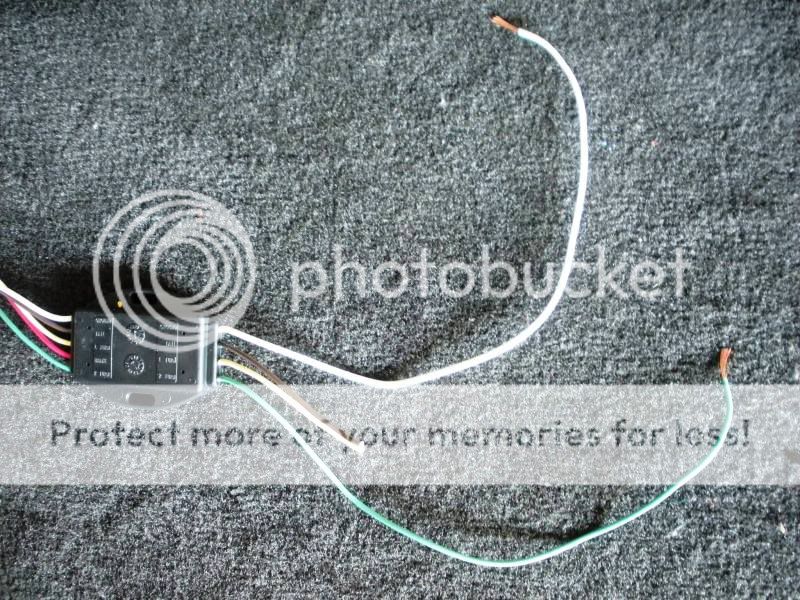
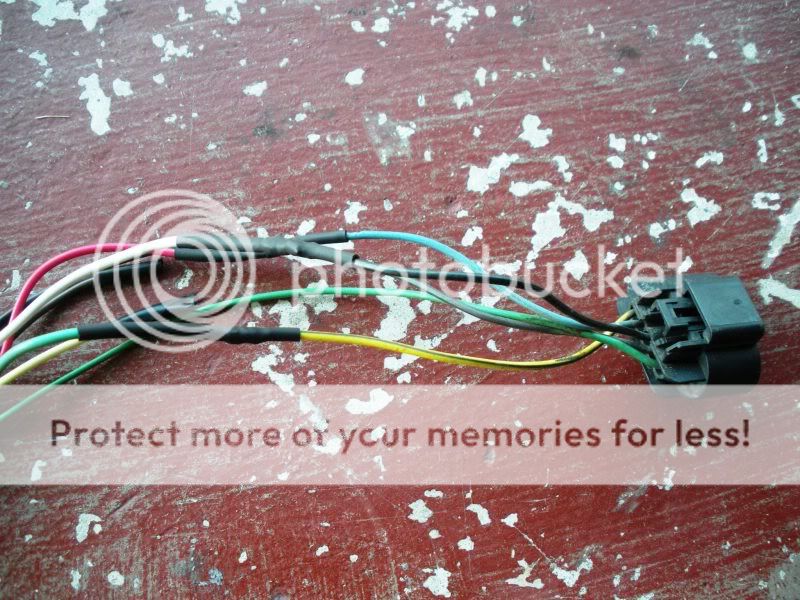
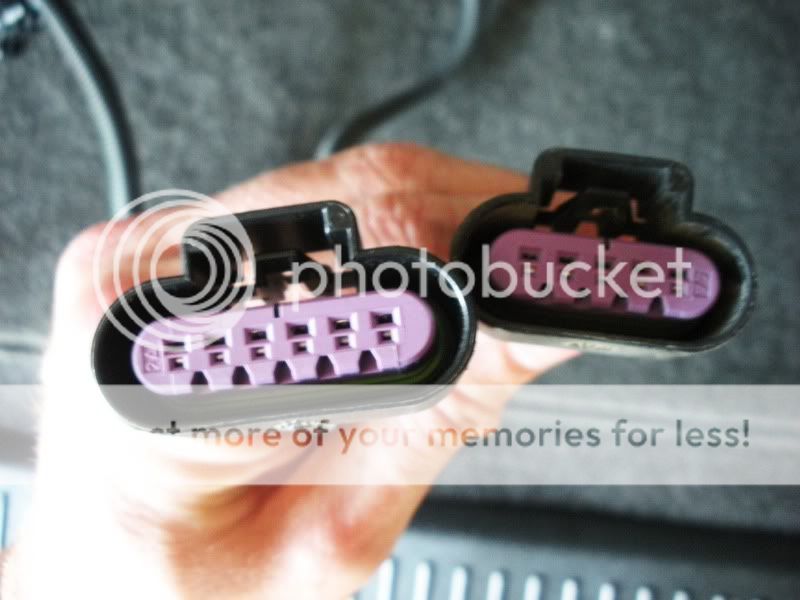
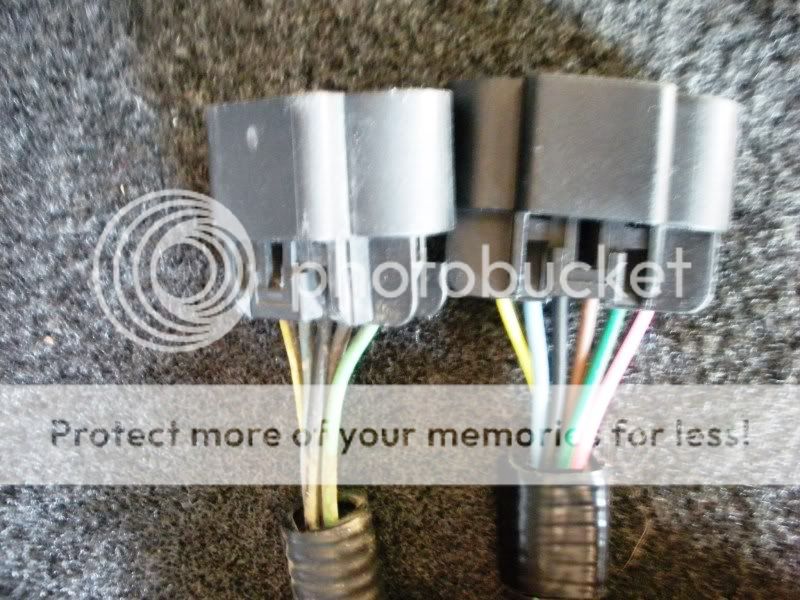
This is a shot of the plugs of the Escalade lights and Tahoe lights. This is why you need the Hopkins Trailer Harness Convertor. Escalade has 5 wires and Tahoe has 4.
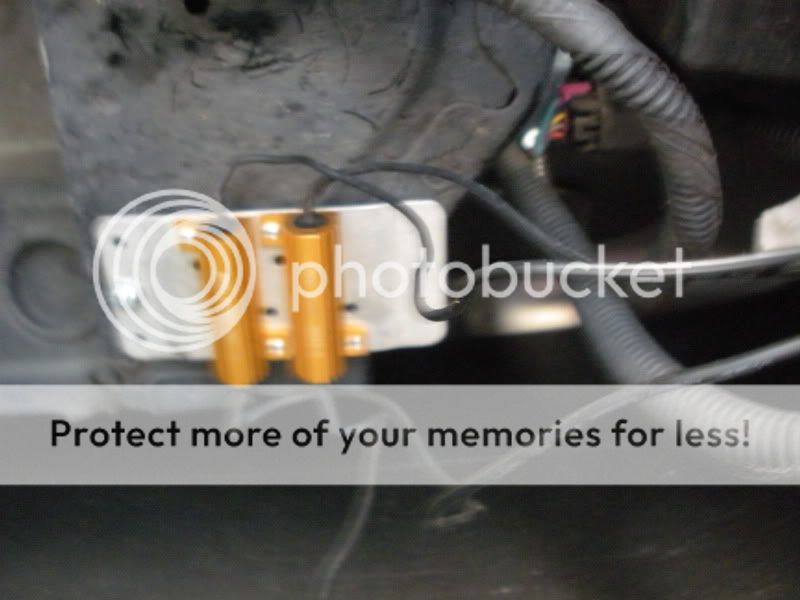
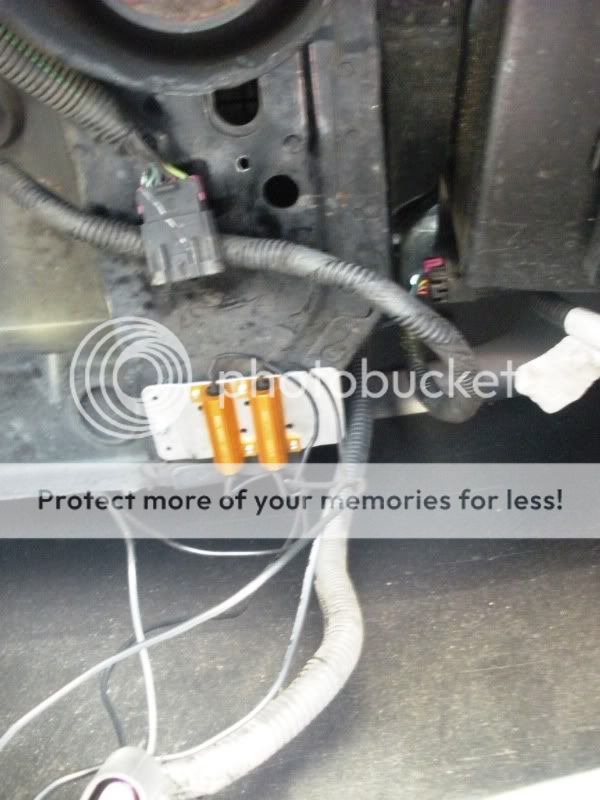
Before we get into the harnesses, let's go ahead and mount those resistors to their mounting plates. Due to them getting extremely hot, it was recommended by v-leds.com to mount them to an aluminum plate to dissapate heat and then mount those to a metal surface (we'll get to that). So, me being OCD, I bought the resistors and plates and used a rivet gun from Harbor Freight ($5.49) and riveted them to the plate, as pictured.

Aren't the pretty??
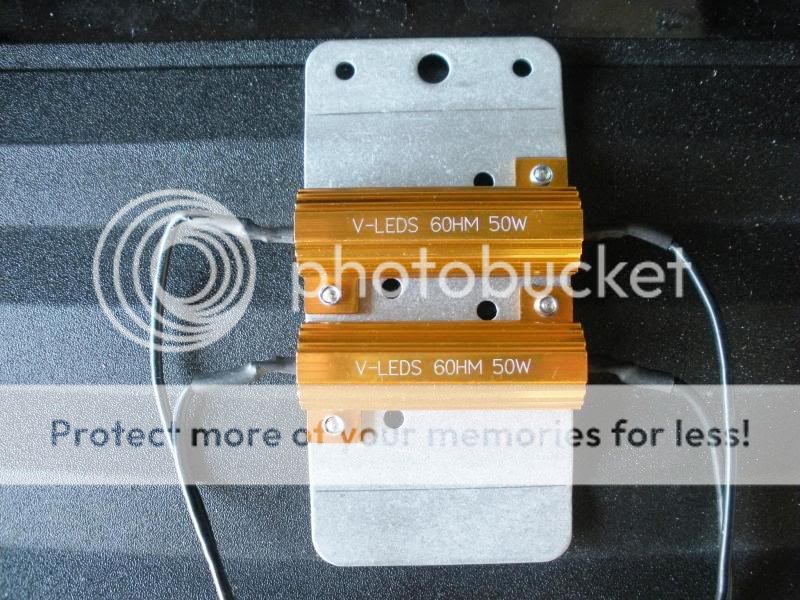
Also in this picture is the Hopkins Trailer Harness, shown above the resistor plates. We'll hack that harness up shortly...
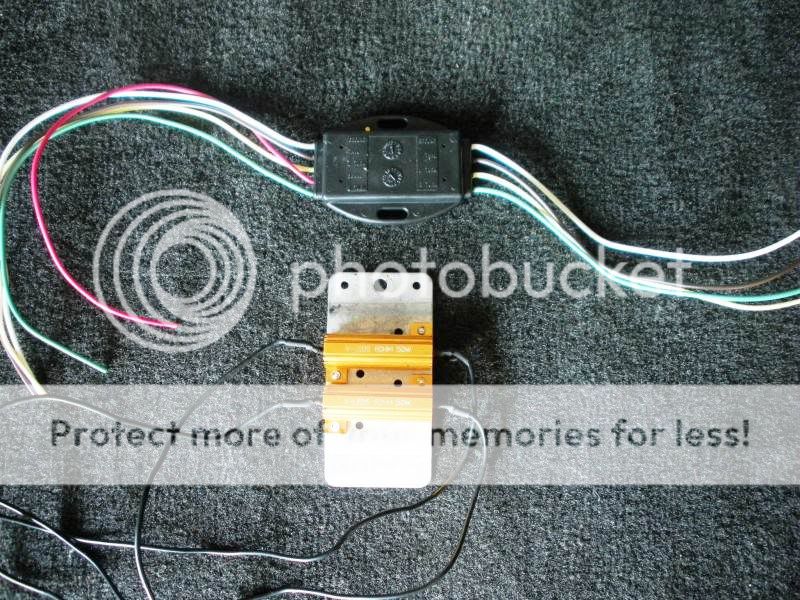
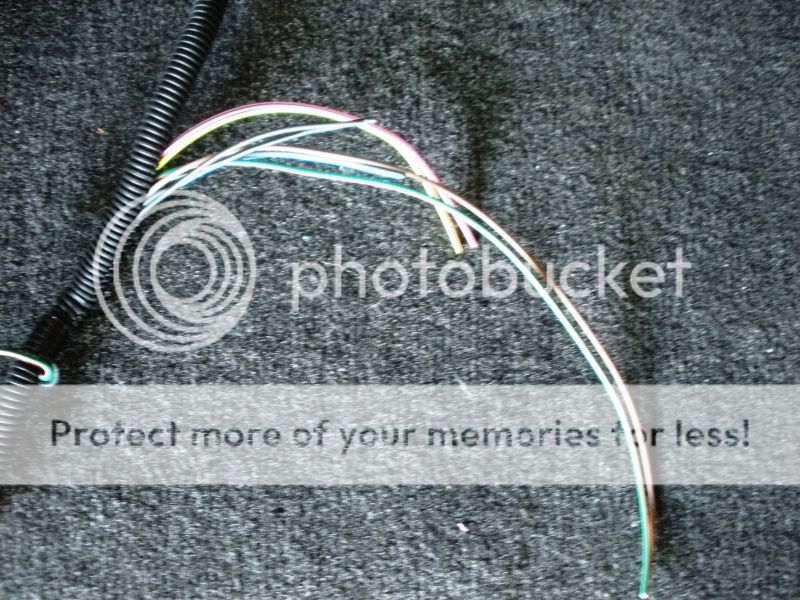
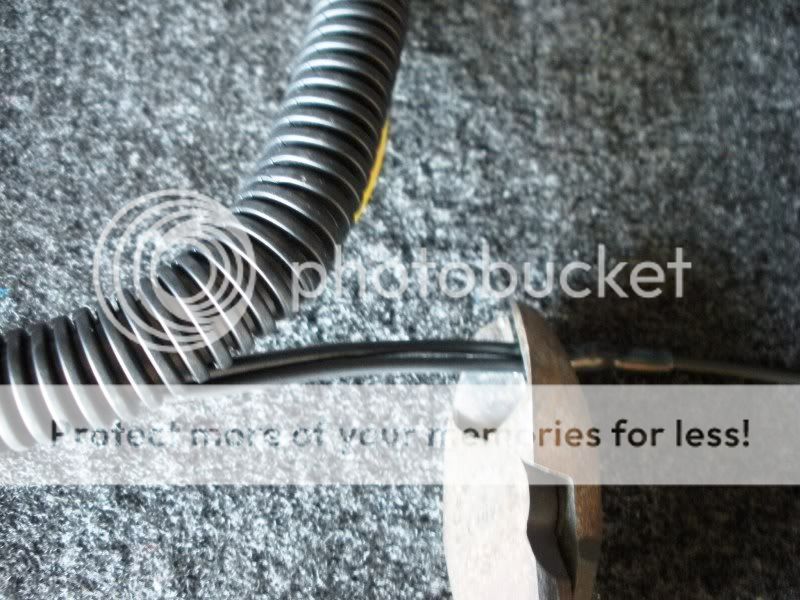
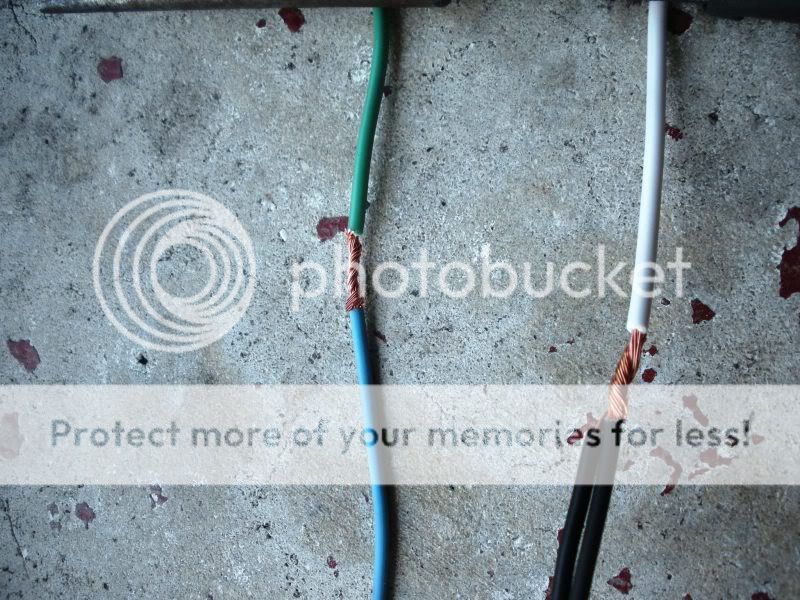
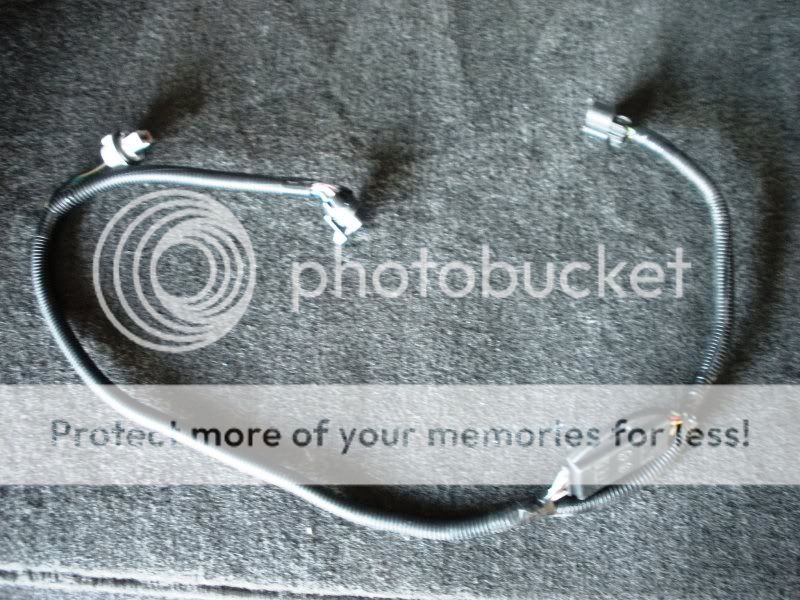
We're going to start modifying and splicing the Escalade Harness first. Peel back the wireloom until you get right about to the reverse lamp bulb. Cut the actual harness off about 4" behind the main plug, as pictured. Set the harness aside.
(pic below are both Escalade harnesses to show you how far to cut back)
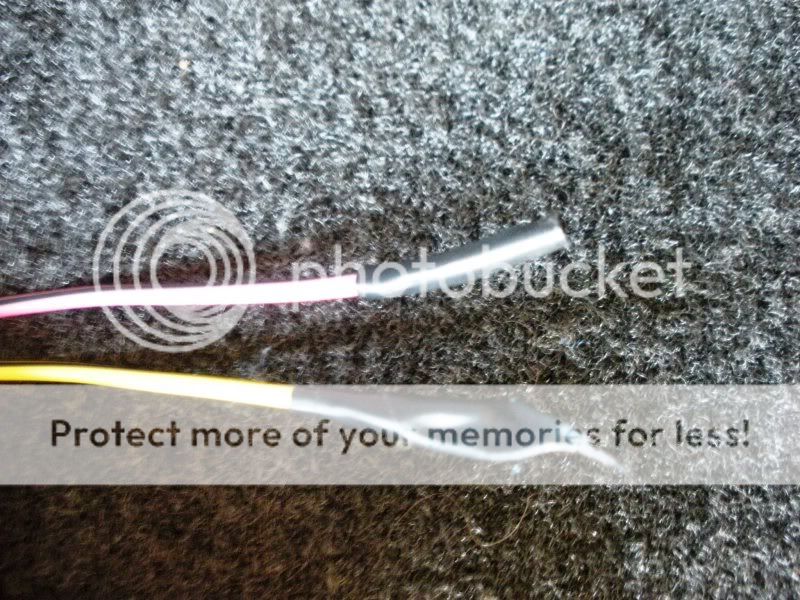
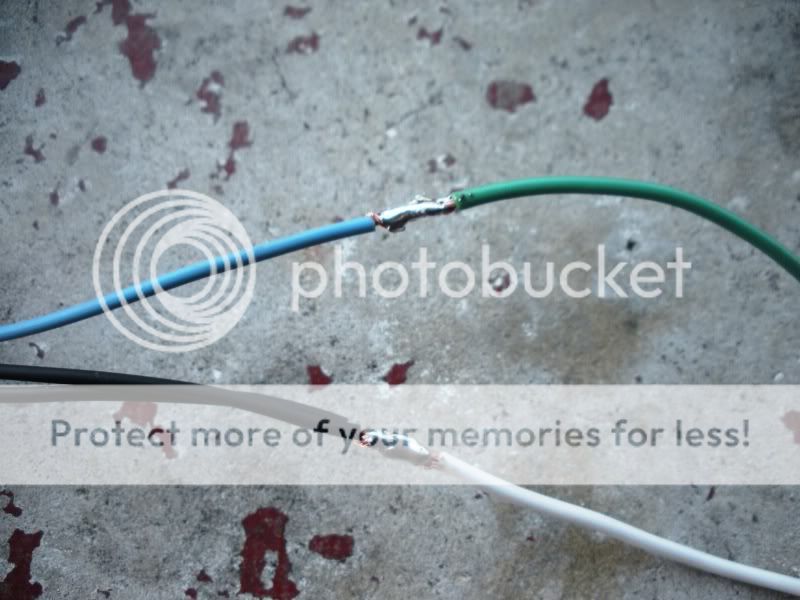
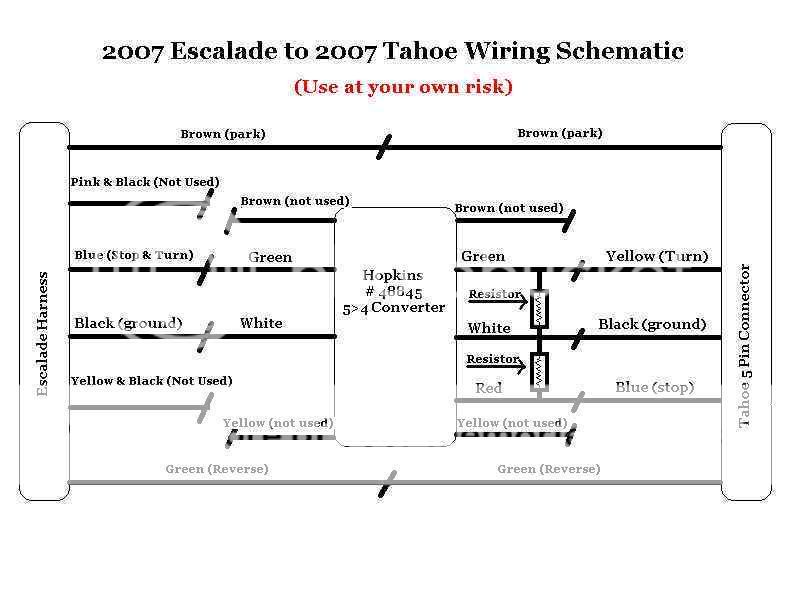
Using this schematic, you are going to want to make connections between the Escalade Harness and the 4-wire side of the Hopkins Harness:
-V1.0 Harness as pictured in the how-to (requires you to do some extra splicing) $160.00 shipped
-V2.0 Harness (see post #38) $185 shipped
*You will need to send me your Escalade harness, everything else is included
_____________________________________________________________________________________________________________________
I'm sure there has been a few write-ups on this topic, but I figured I'd give it a shot at an all-inclusive "how-to" that actually has pictures and won't disappear on us! I'll be combining some pointers from some previous threads to make this one the "Ultimate HOW TO Thread!"
NOTE: If anyone is interested in one of these harnesses, I would be willing to build them, PM me for details. I can make them shorter if necessary, but I think these served their purpose. This write-up is for my first version of the plug and play harness, V1.0, I am working on a badass V2.0 harness that is completely 100% plug and play, no mounting of resistors needed at all!! :Handshake:
I got the option to score a set of these badboys from a local friend. Since we already had the Escalade 3rd Brake Light, it made it a no brainer to stick these on. This mod is time consuming if you do it the way I did it. Of course, there are short cuts, but I wanted this to look as OEM as possible and be completely plug and play, so I opted to splice the Escalade harness into an existing Tahoe/Suburban/Yukon harness, while soldering all the wires, heatshrinking the connections, and wire looming it all together. All in all it took me roughly two hours to do the first harness and about 25 minutes to do the second (once I got everything measured out so they looked identical).
TOOLS NEEDED FOR THIS PROJECT (What I Used):
-Phillips Head Screwdriver
-Soldering Iron w/ Solder
-Butane Heat Torch or Heat Gun
-Drill with metal drill bits
-Wire Crimpers
-Wire Cutters
-Wiring Schematic (attached to this thread)
-Rivet Gun (not needed, but for my install it is, you'll see why!)
PARTS NEEDED FOR THIS PROJECT (What I used):
-Escalade Tail Lamps, Right and Left Side
-2qty 5 to 4 Trailer Harness Converters (Hopkins #48845)
-4qty 6ohm/50 watt Power Resistors
-2qty Dual Power Resistor Mounting Plates
-2qty OEM Tail Lamp Harnesses (So you don't have to cut your stock ones)
-1Qty 15262791 2007 Escalade driver side quarter panel upper appliqué
-1Qty 15262792 2007 Escalade passenger side quarter panel upper appliqué
Escalade Tail Lamp Harness (if you need it) is: 15803483 x 2qty
And on to the install....
Remove your stock tail lights by using a Phillips head screw driver and unscrewing the two screws you see in the pic below. With gentle pressure, the tail light will pop out towards you after the screws are removed. Follow the harness down under the truck and you will see where it is attached to bottom. Unclip it and remove the tail light and harness assembly. Set aside.
Remove the Light harness from the Escalade Tail Lamp. Pictured below is the Escalade Harness on the bottom and the Tahoe Harness on top, you can see the obvious difference.
This is a shot of the plugs of the Escalade lights and Tahoe lights. This is why you need the Hopkins Trailer Harness Convertor. Escalade has 5 wires and Tahoe has 4.
Before we get into the harnesses, let's go ahead and mount those resistors to their mounting plates. Due to them getting extremely hot, it was recommended by v-leds.com to mount them to an aluminum plate to dissapate heat and then mount those to a metal surface (we'll get to that). So, me being OCD, I bought the resistors and plates and used a rivet gun from Harbor Freight ($5.49) and riveted them to the plate, as pictured.
Aren't the pretty??
Also in this picture is the Hopkins Trailer Harness, shown above the resistor plates. We'll hack that harness up shortly...
We're going to start modifying and splicing the Escalade Harness first. Peel back the wireloom until you get right about to the reverse lamp bulb. Cut the actual harness off about 4" behind the main plug, as pictured. Set the harness aside.
(pic below are both Escalade harnesses to show you how far to cut back)
Using this schematic, you are going to want to make connections between the Escalade Harness and the 4-wire side of the Hopkins Harness: