How To Joey Mod(Black) or Clear Headlights

Disclaimer: Links on this page pointing to Amazon, eBay and other sites may include affiliate code. If you click them and make a purchase, we may earn a small commission.

PatrykKoul

Full Access Member
Joined
Feb 15, 2007
Messages
98
Reaction score
0
Location
K-Town
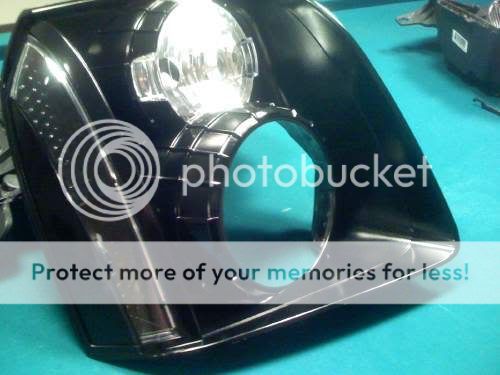
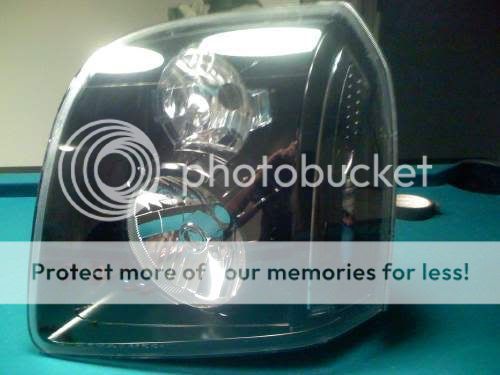
So, I finally decided to do my Black Denali since I've found some time over the Holidays. Here are some pics, and the write up of how to do this awesome mod.

Here are my instructions on blacking out your housings, or clearing your headlights.

1.) Remove your headlights. Use these instructions from snomon
http://www.tahoeforum.com/showthread.php?t=3257 Yukon lights come off same exact way.

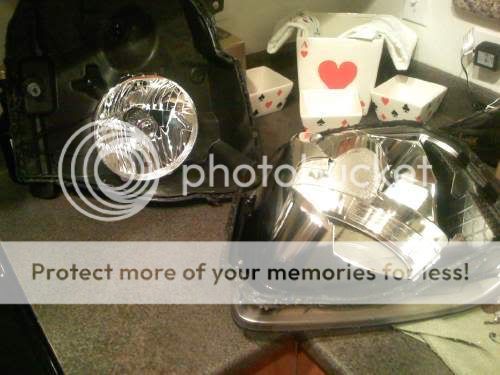
2.) Take your lights inside your house.

3.) Tools Needed
- Gift card to a beauty salon for your wife to get her out of the house for a few of hours
- At least a 6 pack of your beverage of choice
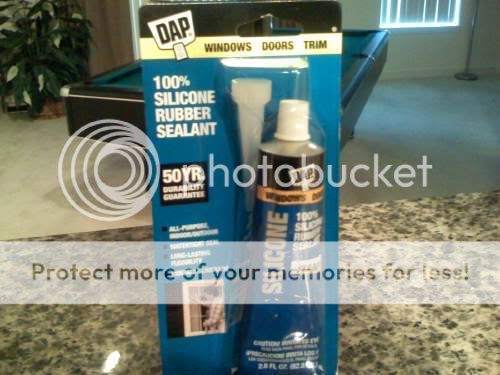
- Silicone (Clear)
- Black Paint for black out or... Chrome Paint if you just want to clear
- Oven
- Flat Head Screw Driver
- t10 tork screw driver or bit,(Shaped Like 6 sided star) I believe that's the size... Mine didn't say, I just grabed the one that fit.

IMG_0027.jpg


IMG_0028.jpg


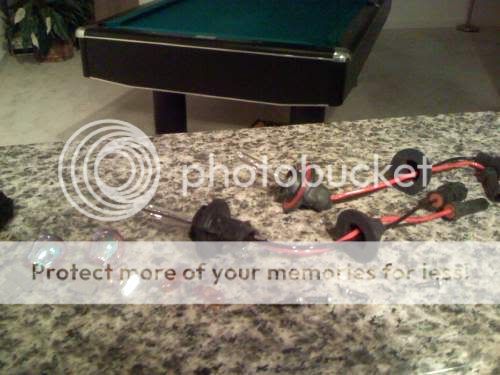
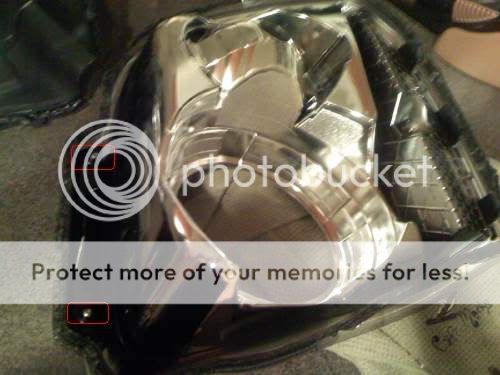
5.) Remove your bulbs

IMG_0030-1.jpg


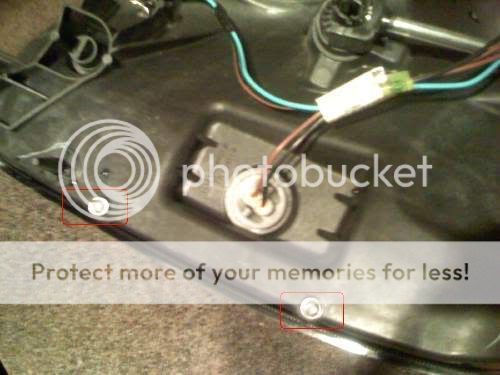
6.) Remove these screws

IMG_0029.jpg


7.) Preheat Oven to 190 Deg.

IMG_0033.jpg


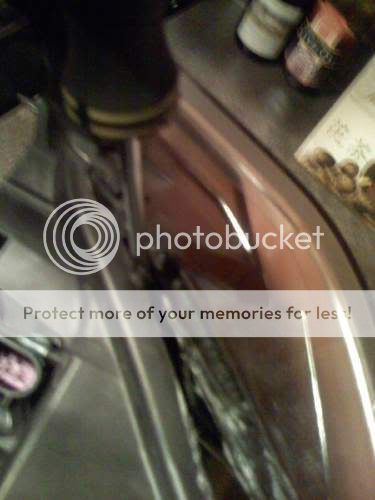
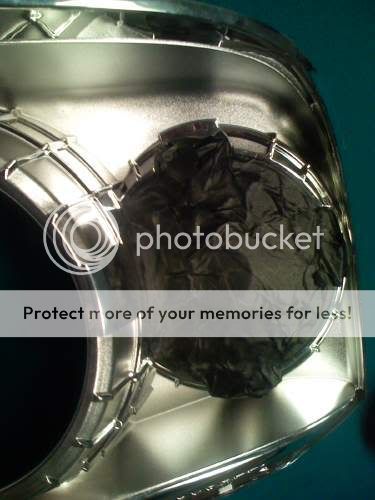
8.) Place light in oven for about 2 mins. You are going to have to do this a few times, I had to do it about 4 times for each light. When you start prying on one side, it will start to cool off and the factory sealant will harden up again. Place it in the oven again to loosen and soften up the sealant again.

IMG_0032.jpg


9.) Start working on prying carefully. The best side I found to work on first is the inside off the lights that mount up towards the grille.

IMG_0035.jpg


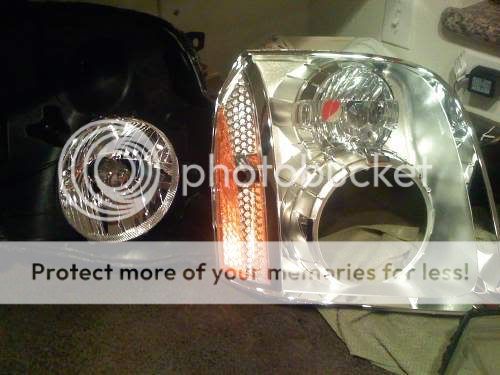
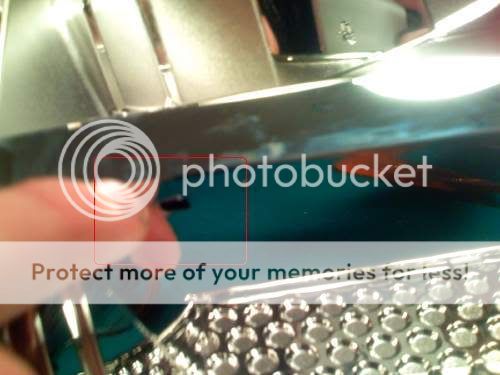
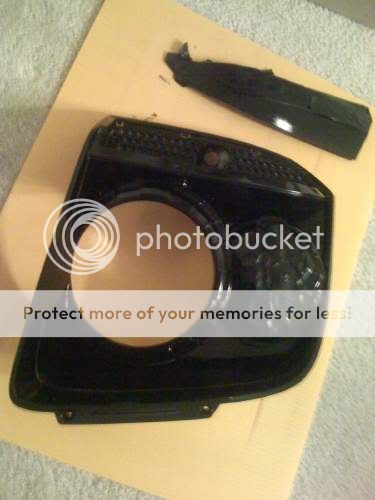
10.) Viola, they are apart. Now get these next 2 screws out.

IMG_0036.jpg


IMG_0037.jpg


11.) Now once you take these screws out, pull the inside housing out.

IMG_0045.jpg
 
Last edited:

PatrykKoul

Full Access Member
Joined
Feb 15, 2007
Messages
98
Reaction score
0
Location
K-Town
12.) Take the orange side reflector out

there are 3 clips on each one. Push on them from the inside, then flip them over and take a plastic knife to pry them out.

IMG_0052.jpg


IMG_0053.jpg


13.) Tape them ugly orange reflectors on both sides.

IMG_0055.jpg


14.) Paint the reflectors on both sides. You chose, I went black cause I am doing my whole lights black. When I cleared my lights, I used chrome paint.

15.) If you are painting your inside lights, tape off the top clear cover. I couldn't get this darn thing out... there are 3 clips, and I could only get one out. So I just taped it off.

IMG_0077.jpg


IMG_0078.jpg


16.) Paint the inside of your lights. I had to use like 7 coats, cause the paint wasn't sticking to the chrome parts well. I probably should have used etching primer...

IMG_0091.jpg


17.) Let them dry, then take the tape off

IMG_0092.jpg


18.) Place the coners back in, the old orange reflectors that are now chrome or black.

IMG_0096.jpg


19.) Place the painted part back in the clear plastic front.

20.) Put back those 2 screws you used when taking the inner housing out.

21.) Place only the back of the headlight back in the oven for about 4 mins to get the factory sealant soft.

22.) Use your silicone to line the groves on the back of the headlight.

23.) Place the front and backs together

24.) Apply the 2 screws on the outside

25.) Bungee Cord those bad boys tight, and leave them for a while

26.) Take the bungees off, look at your lights.

IMG_0106.jpg


27.) Put your bulbs back in

28.) Put the lights back on your car!

I'll post pics of them on my car tomorrow morning! :)
 
Last edited:

ddd269

New Member
Joined
Dec 4, 2007
Messages
11
Reaction score
0
Location
Torrance, CA
Looks good. I'm sure they will look great on your black Denali.

I would like to change/paint the ugly orange reflectors, too.

Too much work just for that though... unless I paint the headlights white. :rolleyes:

But thanks for the post... This is just the info that I needed to remove the headlight assembly.
 
Last edited:

rockrawler

Full Access Member
Joined
Oct 9, 2007
Messages
98
Reaction score
0
Location
T-Town, Okiehoma
thank you, thank you, thank you! I have been wanting to do this mod ever since I bought the truck I just did not want to be thefirst to try it. Good job and I cant wait to see pics of them on.
 

gmcul8r

Full Access Member
Joined
Jan 19, 2007
Messages
231
Reaction score
0
Finally!!! Thanks for the help, now I just have to get the stones to try it.
 

Getwired

Full Access Member
Joined
Jul 24, 2007
Messages
1,591
Reaction score
0
Location
DC Suburbs
Thanks PatrykKoul for the nice write-up. Thanks for sharing the knowledge!! :thumbsup: They look really nice.
 

PatrykKoul

Full Access Member
Joined
Feb 15, 2007
Messages
98
Reaction score
0
Location
K-Town
There are pics up... I took them on my Iphone, so the quality isn't the best
 

gmcul8r

Full Access Member
Joined
Jan 19, 2007
Messages
231
Reaction score
0
Where are the pictures!! Where are the pictures!!
 

Getwired

Full Access Member
Joined
Jul 24, 2007
Messages
1,591
Reaction score
0
Location
DC Suburbs
Where are the pictures!! Where are the pictures!!


WTF is everyone talking about? The pictures are in his two original posts! Clear your browser cache and reload the page -- he uploaded the pictures when he edited the posts at like 2:20AM today... :crazy:
 

Rollin Thunder

Full Access Member
Joined
Aug 29, 2007
Messages
6,467
Reaction score
3
Location
Va, beach, va
WTF is everyone talking about? The pictures are in his two original posts! Clear your browser cache and reload the page -- he uploaded the pictures when he edited the posts at like 2:20AM today... :crazy:

we want to see them on the truck though, he said and i quote
I'll post pics of them on my car tomorrow morning!

so thats why we want to see pics, :D
 

PatrykKoul

Full Access Member
Joined
Feb 15, 2007
Messages
98
Reaction score
0
Location
K-Town
IMG_0255.jpg


Here is one pic from my Iphone. It was pooring rain all day, and my car is dirty as heck. Soon as I wash it up, I'll take some shots outside.
 

ddd269

New Member
Joined
Dec 4, 2007
Messages
11
Reaction score
0
Location
Torrance, CA
Finally a picture!

I thought that there was going to be a riot. Everybody went nuts!

whew... calm down now guys, about the picture. :shhh:
 

Getwired

Full Access Member
Joined
Jul 24, 2007
Messages
1,591
Reaction score
0
Location
DC Suburbs
I thought that there was going to be a riot. Everybody went nuts!

whew... calm down now guys, about the picture. :shhh:

I know man! I think some folks need to get out more!!! :crazy: It's like "Give the guy a break", right?!? :yesnod:

Thanks again PatrykKoul, they look really cool. We'll be happy to see more pics when you can post 'em... :thumbsup:
 

rockrawler

Full Access Member
Joined
Oct 9, 2007
Messages
98
Reaction score
0
Location
T-Town, Okiehoma
Looks killer, thanks for putting up the pic. I can't wait to see a couple more shots. I just ordered my HID's and plan on doing this mod at the same time. Thank you so much for the write up, it's going to help out a lot.
 
Top